Artlist AI image editing: change one thing, keep the rest

Table of contents
You generated the perfect image. The lighting is right, the composition works, the mood is exactly what you wanted. Except the product label is the wrong color.
So you reroll. The label is fixed, but now the background has shifted and the model looks different. You reroll again. And again.
That's the catch with editing AI images as a whole: every change is a gamble on everything else. The Artlist Image Editor works differently. It splits your image into layers, so you change one element and the rest stays exactly where it is.
This guide explains how AI image editing works, how layers change the workflow, and four ways creators use them — from removing a background to building a full campaign from a single visual. If you haven't made your image yet, start with how to generate AI images.
What is AI image editing?
AI image editing uses artificial intelligence to modify, enhance, or transform an image through text prompts or selections, instead of manual pixel-by-pixel work. You describe the change you want, and the AI handles the rest. Artlist's Image Editor splits your image into layers, so you can change one element without regenerating the rest.
It's different from image generation. Generating an image creates something new from a prompt. Editing starts with an image you already have — generated, photographed, or designed — and changes only the parts you point to.
Traditional photo editing does the same job with manual selections, masks, and layer management. AI image editing reads the image for you, so you skip the masking and the Photoshop learning curve.
Why regenerating wastes time
Most AI image editors treat the image as one piece. You describe a change, and the model may regenerate parts you wanted to keep — shifting colors, lighting, composition, or small details along the way.
That creates two problems:
- Drift. The edit you asked for lands, but something you liked disappears.
- Volume. The more attempts it takes to get one change right, the more credits you use.
Picture a thumbnail you've tuned for an hour. You only want a brighter background, but the next generation changes the subject's expression, the text placement, and the color grade. You didn't ask for any of that, and now you have to choose between the new background and everything you lost.
For a single image, that's annoying. For video creators, marketers, and brand teams producing dozens of thumbnails, ads, or social assets, it becomes a production bottleneck. You need to change what you want and keep the rest.
How layer-by-layer editing works
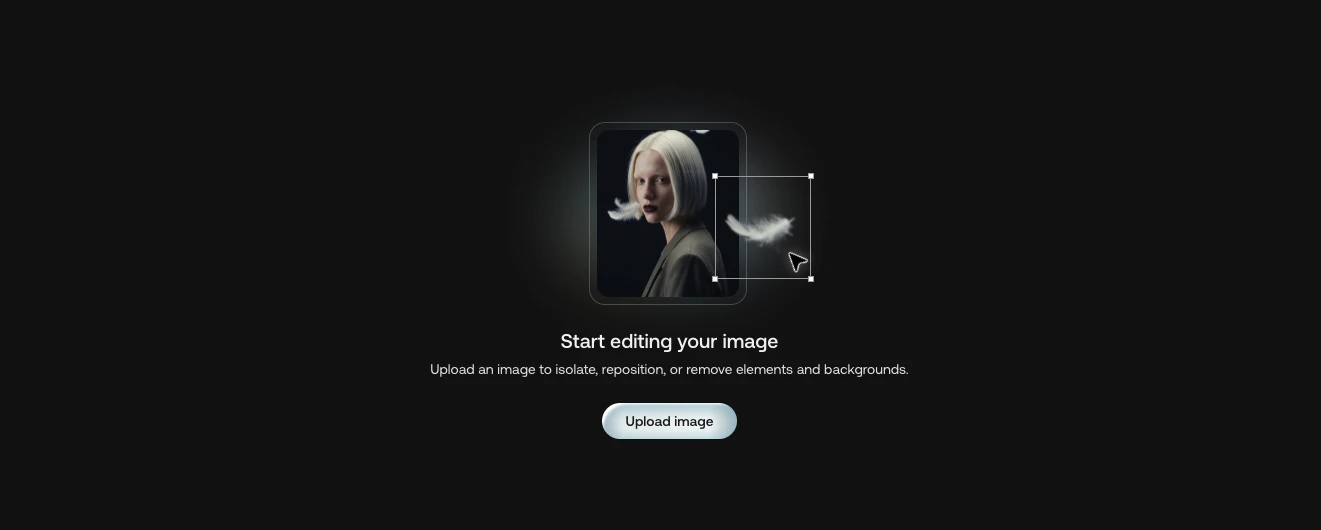
Instead of treating your image as a flat surface, the Image Editor separates it into layers — backgrounds, objects, and individual elements. Each one can be edited on its own.
Here's the basic flow:
- Open your image. The editor splits it into layers automatically. It works on any image, including flattened ones.
- Select what you want to change. Click a layer or select an area.
- Describe the edit. Write it in plain language, like "make the bottle matte black." For better results, check these prompt tips.
- Apply it. Apply the edit to a single layer or to the whole image. Everything you didn't select stays the same.
Here are a few examples of edits you can describe in a sentence:
- "Change the background to a sunlit kitchen"
- "Make the jacket dark green"
- "Remove the sign behind the model"
- "Replace the can with a glass bottle"
Keep each prompt focused on one element. The more specific you are, the cleaner the result.
You don't always need a prompt. You can also move, hide, resize, reorder, or remove individual elements directly. What you change changes. What you keep stays.
Remove a background in seconds
Need a clean cutout or a new setting? The BG Remover strips or changes the background on any layer, or on a flattened image.
Use it to isolate a product for a marketplace listing, drop a subject into a different scene, or clear a distracting background from a thumbnail. Because the background lives on its own layer, you can replace it without touching the subject.
Swap products without losing the creative
Say you have an ad the client loves: the right model, the right light, the right mood. Now they want the same shot for two more flavors.
Select the product layer and swap the product, packaging, or color. The background, model, lighting, and overall creative stay intact. You keep the approved shot and change only what the brief changed.
This also works for smaller fixes. Recolor a label, replace a bottle, or update packaging for a seasonal version, all without rebuilding the image.
Build multiple campaigns from one visual
One visual rarely fits every audience, market, and format. With layers, you don't have to rebuild it each time.
Keep the same model and lighting, then change the background, props, or product for each version. One hero image can become a city street for one market, a café for another, and a studio set for a third. No reshoot, no full regeneration.
Create the master visual once. Then adapt it for each campaign.
More ways to use layer editing
Fix a thumbnail without rebuilding it
Change the background, colors, or a single element of a thumbnail and leave the rest of the design as it is.
Keep storyboard frames consistent
Fix one detail in an AI-generated frame while characters, setting, and lighting stay consistent across the scene.
Create social variations for every platform
Make multiple versions of one image for different platforms and campaigns by swapping backgrounds, products, or props.
Tips for cleaner layer edits
A few habits make layer editing faster:
- Start with a strong base. Layers help you fix details, so begin with an image whose composition and lighting you already like.
- Edit one layer at a time. Make a change, check it, then move on. It's easier to spot what worked.
- Be specific in your prompt. "Make the label matte white with thin black text" beats "change the label."
- Save a master version. Keep your approved original so you can branch into variations without losing it.
Layer editing vs. whole-image editing
Both approaches have a place. Here's how they compare:
Whole-image editing | Layer-by-layer editing | |
|---|---|---|
What changes | The model may regenerate the entire image | Only the element you select |
Untouched areas | Can shift in color, lighting, or composition | Stay intact |
Retries | Often several to land one change | Each edit stays contained |
Best for | Big creative shifts and new concepts | Targeted fixes, variations, and brand-consistent assets |
For a full style change, an image-to-image AI generator is the better fit. When you want to keep most of your image and change one thing, layers win.
Who layer editing is for
You don't need to be a designer. Layer editing helps anyone who works with images under time pressure:
- Video creators who need a thumbnail tweaked before the upload goes live.
- Social media managers who turn one image into versions for several platforms.
- Marketers and brand teams who adapt one approved visual for different audiences and markets.
- Filmmakers and storytellers who keep AI-generated storyboard frames consistent from shot to shot.
If you've ever thought "it's perfect, except for one thing," this is built for that moment.
Commercial use and licensing
Images you edit with the Artlist Image Editor are covered by the Artlist universal license, the same license that covers music, footage, and sound effects on the platform. That includes client work, paid ads, and published content, with no separate licensing terms to negotiate.
It's also one workflow. On Artlist AI, you can generate an image, edit it layer by layer, bring it to life with the AI video generator, and add royalty-free music without switching platforms.
AI image editing FAQ
How does Artlist's AI image editor work?
It splits your image into layers. Describe an edit in plain text or use guided selections, and only the selected element updates. The rest of the scene stays the same.
Can I edit an image without regenerating it?
Yes. Layer-by-layer editing changes only what you select, such as a background, product, or color, so the rest of the image stays intact.
Can I remove a background from an AI image?
Yes. The BG Remover strips or changes the background on any layer or on a flattened image.
Can I use AI-edited images commercially?
Yes. Images edited with Artlist's Image Editor are covered by the Artlist universal license, including client work, paid ads, and published content.
Do I need design experience to edit images with AI?
No. You describe the change in plain language or select an area. No masking or Photoshop skills required.
Edit smarter with layers
The best edit is the one that changes only what you meant to change. Layers give you that control: swap the product, fix the detail, or build the next campaign, and keep everything else exactly as you made it.